Email Signature

Email Signature should always be written without logo and academic titles.

The corporate language is English. The content of the signature must therefore be written exclusively in English. 

*„Area of responsibility" can be:
a) Hamburger Containerboard Division
b) Region Germany or Region Austria&Hungary or Region Türkiye or
c) Location Pitten/Dunaujvaros/Spremberg/...
d) "Area of responsibility" can be left out if your area of responsibility is valid for one company and not more.

You can add an email signature banner of your choice - please find the instructions and available banners below. 


Email Signature Instructions

We aim to ensure that our email communication is professional and uniform. An essential component of this is the email signature displayed in each message. To ensure that your email signature is correct and consistent, please follow the instructions below to upload it in Microsoft Outlook:

Step 1: Open Microsoft Outlook.

Step 2: In the top menu bar, click on "File" and select "Options" from the dropdown menu.

Step 3: In the "Outlook Options" window, choose the "Mail" category.

Step 4: Scroll down and find the "Signatures" section. Here, click on "Signatures."

Step 5: In the "Email Signatures" window that opens, you can create new signatures or edit existing ones. Click "New" to create your signature.

Step 6: Enter a name for your signature and click "OK."

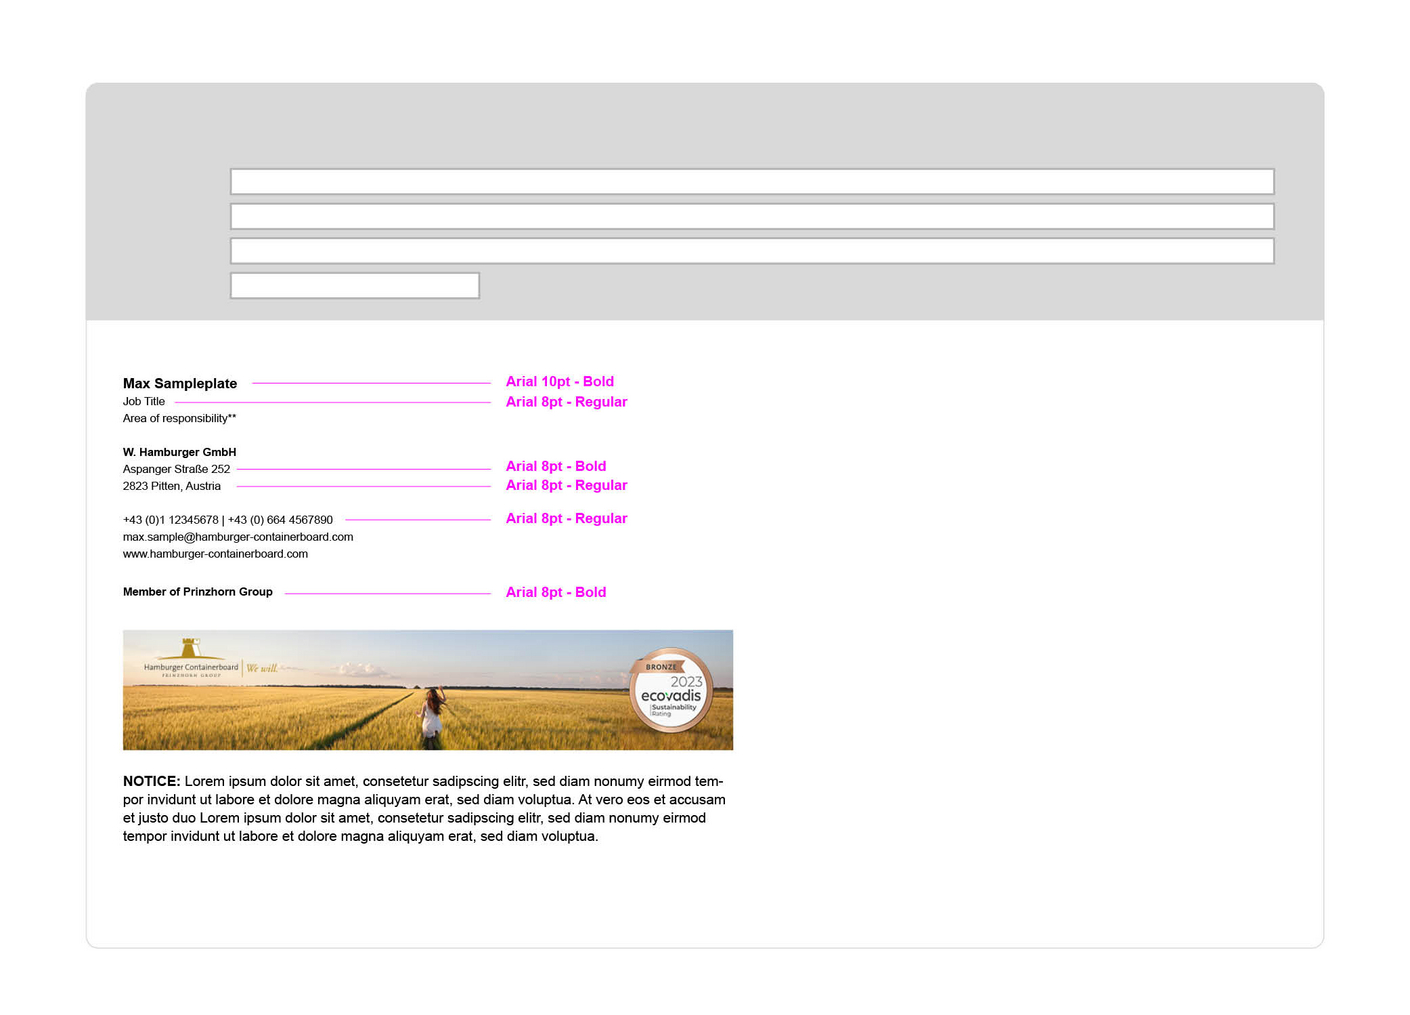
Step 7: In the text box under "Edit signature," you can format your desired signature. You can add text, apply formatting, and insert images (see available email signature banners) to customize your signature.

Step 8: Once you're satisfied with your signature, click "OK" to save it.

Step 9: Now, return to the "Default signatures" section and choose your desired default signature for new messages and replies/forwards from the dropdown menus.

Step 10: Finally, click "OK" to save the settings.

Your new email signature is now set up in Microsoft Outlook and will be automatically added to your messages.

Email Banner Instructions

  1. In Outlook, click on "File" in the top left corner (Outlook 2016 and later). 

  2. In the Outlook Options window, go to the "Mail" tab and click on "Signatures." Here, you can create a new signature or edit an existing one.

  3. In the Signature editor, position your cursor where you want to add the image in your signature.

  4. Click on the "Insert Picture" icon (it looks like a picture frame) and paste the URL of the image you hosted earlier in the dialog box.

  5. You may want to hyperlink the image to a specific webpage, such as our website. Select the image, then click the "Hyperlink" button (looks like a chain link) to enter the URL you want to link to.

  6. After adding the image and making any other desired changes to your signature, click "OK" to save it.

  7. Compose a test email to ensure that your new signature, including the banner image, displays correctly.